> ## Documentation Index
> Fetch the complete documentation index at: https://docs.topsort.com/llms.txt
> Use this file to discover all available pages before exploring further.
# Setup and Integration
> Implementing CDP integration and custom audience building
export const LastUpdated = ({date, lang = "en"}) => {
const translations = {
en: "Last updated:",
es: "Última actualización:",
pt: "Última atualização:",
fr: "Dernière mise à jour:",
de: "Zuletzt aktualisiert:"
};
const label = translations[lang] || translations.en;
return <>
;
};
This guide covers the technical implementation of audience targeting, from CDP integration to custom audience building and API integration.
## CDP Integration
Customer Data Platform (CDP) integration is the most powerful method for leveraging your existing audience infrastructure. By connecting your CDP to Topsort, you unlock sophisticated targeting capabilities that drive significantly higher campaign performance.
### Precision Targeting and Audience Segmentation
Create detailed audience segments based on customer behavior, preferences, purchase history, and engagement patterns. This granular approach allows you to reach users with highly relevant messaging at the optimal moment in their customer journey.
Common high-value segments include:
* New customer acquisition targeting first-time buyers and site visitors who haven't purchased
* Customer retention focusing on lapsed users (30+ days since last visit) and repeat purchasers
* Category affinity groups for specific verticals like healthcare, electronics, or beauty
* Behavioral segments such as cart abandoners, high-value customers, and seasonal shoppers
* Competitive conquest campaigns targeting users who purchased from competitor brands
These targeted segments typically see 2-4x higher conversion rates compared to broad targeting.
### Automatic Synchronization
CDP segments sync automatically with Topsort daily, ensuring your campaigns always target the most current audience data without manual intervention. This eliminates the need for constant manual updates while keeping your targeting fresh and relevant.
### Real-Time Data Activation
Audience segments become immediately available for campaign targeting once synced, enabling dynamic and responsive advertising strategies that adapt to changing customer behaviors.
## Custom Audience Building
Build sophisticated audiences using inclusion and exclusion logic to create precisely targeted campaigns. This approach gives you complete control over who sees your ads by combining multiple targeting criteria.
### Inclusion Logic
Define users who should be included based on specific criteria that indicate purchase intent or alignment with your campaign goals.
For example, you might include users who purchased electronics in the last 30 days, viewed premium brand pages, or opened multiple marketing emails. Each inclusion criterion should support your campaign objective and help identify users most likely to convert.
### Exclusion Logic
Refine your audience by excluding segments that won't benefit from your campaign or could waste ad spend.
Common exclusion strategies include removing recent purchasers of the promoted product, users already subscribed to competitor loyalty programs, or customers who exceed your cost-per-acquisition targets.
#### Advanced Targeting Example
Target electronics enthusiasts ready for premium purchases by including users who viewed electronics categories AND have purchase history over \$500, while excluding those who purchased electronics in the last 14 days OR are already in current electronics campaigns.
This creates a focused audience of high-intent, high-value prospects not currently being targeted.
### CSV Upload Format
Upload a CSV file with users that belong to an audience segment. The CSV should have the following columns:
* **opaque\_user\_id**: Customer ID that the user has on your side
* **email**: Email of the user
* **hashed\_email**: Email of the user hashed using SHA256
* **idfa**: Apple ID of the device of the user
* **hashed\_idfa**: Apple ID of the device of the user hashed using SHA256
* **gaid**: Android ID of the device of the user
* **hashed\_gaid**: Android ID of the device of the user hashed using SHA256
For the same identifier, the user can share either the raw version or the hashed version but not both. When uploading a CSV with raw data (email, idfa, or gaid), Topsort hashes the identifiers to comply with privacy and security requirements.
These audiences can be created using the Audience Tab in the UI or the APIs.
## Predefined Audience Libraries
Access curated, high-performing audience segments that have been optimized across multiple campaigns and verticals.
These ready-to-use segments include industry-standard behavioral patterns, seasonal shopping audiences, cross-category affinity groups, and demographic segments. Predefined libraries save time during campaign setup while providing proven targeting strategies that consistently drive results.
## Implementation Guide
Begin by organizing your audience data and defining clear targeting objectives.
For CDP integration, coordinate with your CDP provider to grant API access to audience segments. Map your existing segments to Topsort's taxonomy and establish automated daily synchronization schedules to keep data fresh.
For custom audiences, define your targeting criteria and business objectives upfront. Gather necessary data points including user IDs, behavioral events, and purchase history. Plan your inclusion and exclusion logic to achieve optimal audience sizing that balances reach with precision.
Integrate audience data through our comprehensive Segments API, which handles userID hashing and connects with our Audience Builder to process both CDP data and behavioral data from your platform.
The integration ensures privacy compliance while maintaining targeting effectiveness.
**Reference**: [Complete Integration Guide](/en/ad-server/additional-apis/segments-api/)
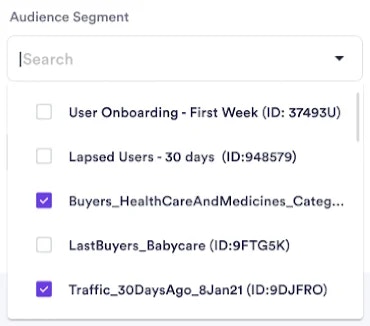
During campaign creation using the Campaign API, select specific audience segments (up to 5 per campaign) to define your target audience.
Configure audience combination logic using AND/OR operators for maximum precision. This flexibility allows you to create complex targeting scenarios that match your specific campaign goals.
 Include the `opaqueUserId` in auction requests to enable real-time audience matching. The Auction API connects with our User Store to match users against configured segments during bid evaluation.
```json theme={null}
{
"auctions": [
{
"type": "banners",
"slots": 1,
"slotId": "homepage_banner",
"device": "mobile",
"opaqueUserId": "0000488787_0681bb44-8553-41f3-a912-ca526afab323"
}
]
}
```
## Next Steps
Include the `opaqueUserId` in auction requests to enable real-time audience matching. The Auction API connects with our User Store to match users against configured segments during bid evaluation.
```json theme={null}
{
"auctions": [
{
"type": "banners",
"slots": 1,
"slotId": "homepage_banner",
"device": "mobile",
"opaqueUserId": "0000488787_0681bb44-8553-41f3-a912-ca526afab323"
}
]
}
```
## Next Steps
Once your audience data is integrated, learn about [activation strategies](/en/knowledge-base/ad-platform/campaign-targeting/segments/strategies) to apply boosting and filtering techniques, or explore [management best practices](/en/knowledge-base/ad-platform/campaign-targeting/segments/management) for ongoing optimization.
***